The GE dishwasher Diagnostic mode is an excellent feature for testing the functionalities of the appliance.
If you are in doubt about an issue with your dishwasher, the Diagnostic mode will help you find the exact root of the problem in your dishwasher.
It will perform various types of tests on the dishwasher and will show you an error code. That is why it is also called Service mode or Test mode.
In this article, I will share the steps required to start the Diagnostic mode on GE dishwashers. I will also provide you with information regarding identifying and troubleshooting the error codes on your GE dishwasher.
So, let’s get started.

Contents
- 1 How do I enter Diagnostic mode on the GE dishwasher?
- 2 GE dishwasher model GDF510PGD, GDF520PGD, GDF530PGD, GDF540PGD, GDF550PGD. How do you enter Diagnostic mode?
- 3 Entering Factory service mode (Diagnostic mode) on GE dishwasher model GE GLDT690T
- 4 How to enter Test mode on a Ge Triton or PWD8900 Series dishwasher?
- 5 How to enter Service mode on GE profile PWD9700 and PWD9900 Series.
- 6 Entering Diagnostic mode on GE Cafe dishwashers.
- 7 Identifying and resolving Error codes on GE dishwashers.
- 8 What should I do if the Diagnostic mode is not working on my dishwasher?
- 9 Infographic: How to start diagnostic mode on GE dishwasher?
- 10 FAQs
- 11 Conclusion
How do I enter Diagnostic mode on the GE dishwasher?
Before starting the Diagnostic mode, make sure that your dishwasher is in Stand-by mode, which means your dishwasher should not be in a running stage.
Now, when your dishwasher is in Stand-by mode, follow the below-given steps:
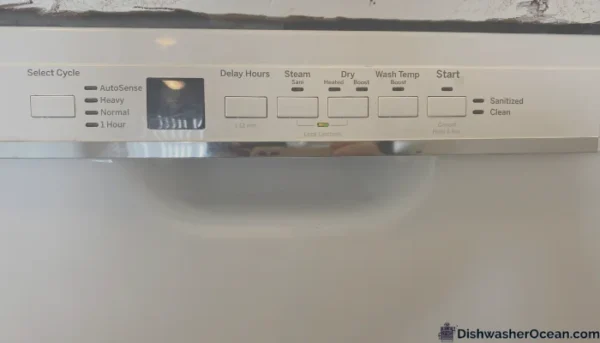
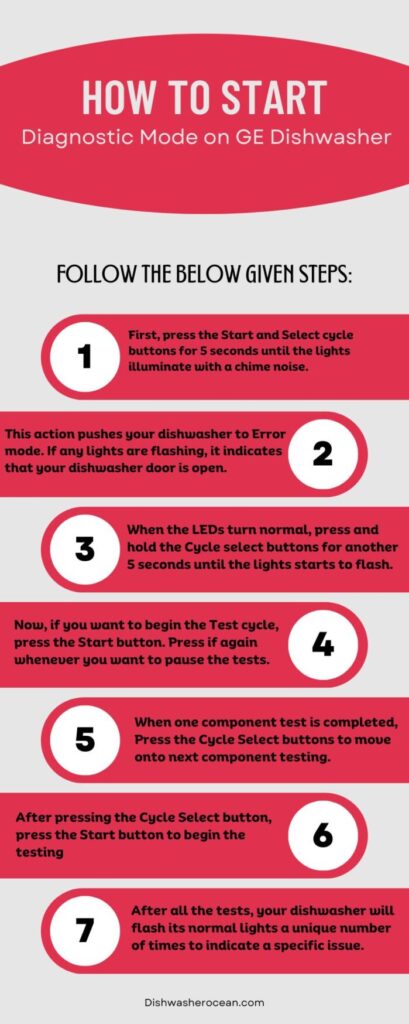
- The First step is to press the ‘Start’ and ‘Cycle select buttons’ together for five seconds. The LED on the display will light up after a chime sound.
- Now, your dishwasher is in Error code display mode. Note: If the LED starts flashing, the dishwasher detects an open door.
- After that, all the LEDs will turn to normal. Next, you will have to hold only the ‘Cycle select button’ for another 5 seconds until the LED starts flashing.
- The flashing LED is an indication that your dishwasher is now ready to test its different parts. You can press the ‘Start’ button to begin the testing. Press the ‘Start’ button again to pause the testing.
- Your dishwasher will test each of its parts one by one. After running one test, you will have to press the ‘Cycle select button’ to move on to other testing.
- After pressing the cycle select button, you will have to press the ‘Start’ button to begin the next testing.
- The dishwasher communicates to you by flashing lights. It flashes its normal light a unique number of times to tell you which part of it is being diagnosed.
- Here is a table that will help you identify which part is under testing.
| No. of times the light flashes. | The component to be tested. | Process |
| 1 | Drain Pump | The dishwasher will start draining the water for 75 seconds. |
| 2 | Water Valve | The dishwasher will fill the tub for about 60 seconds. |
| 3 | Circulation Pump | The dishwasher will spray through the different spray arms in an interval of 30 seconds. This process will last for 120 seconds. |
| 4 | Heater | The Dishwasher will turn on the heater for about 120 seconds. |
| 5 | Detergent Dispenser | The Drain solenoid will be activated for 15 seconds. |
After completion of the test on all of the parts, the dishwasher will display an error code on its control panel (Only if it found any issues).
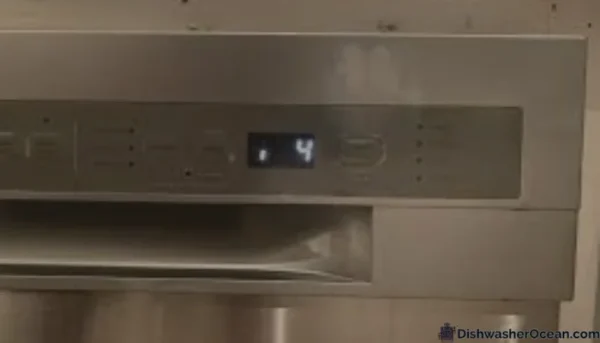
To fix and clean the error code from your GE dishwasher, you will have to perform a manual repair by yourself or by a technician.
When you manually fix the issue, just reset your dishwasher, and the error/fault code will be cleaned.
How to Exit from the Diagnostic Mode(Service mode)?
Exiting from the Diagnostic mode on your GE dishwasher is simple. You will just have to Reset your dishwasher once to Exit the Service mode.
There may be a case that your GE dishwasher model has some other way to operate this mode, but don’t worry. We have shared below the steps required to enter Diagnostic mode(Test mode) on every GE dishwasher model.
Look below for the steps needed to operate Test mode on your GE dishwasher model.
GE dishwasher model GDF510PGD, GDF520PGD, GDF530PGD, GDF540PGD, GDF550PGD. How do you enter Diagnostic mode?
If you have model numbers GDF510PGD, GDF520PGD, GDF530PGD, GDF540PGD, and GDF550PGD dishwasher, follow the below-given instructions to start its Diagnostic mode.
- You can only enter the diagnostics cycle when your dishwasher is in standby mode and not running.
- After that, you will have to enter the error mode. To do so, press the start button and cycle select button simultaneously for 5 seconds.
- After pressing the button, you will hear a chime sound, and all the lights will illuminate.
- Once those lights are off, press the “cycle select” button again for 5 seconds. After that, a normal LED will flash, which means your dishwasher is ready for testing.
- Now, press the Start button to begin testing.
- Once one test is done, press the Cycle select to go to the next test. The LED will now flash twice to indicate that the dishwasher is ready for second testing. Press Start to begin the second test.
You must do the five tests, so continue testing until the fifth test is completed. After that, If your dishwasher displays a code error, it means it detected an issue, or else your dishwasher is safe.
I have listed the meaning of each error/fault code below so you can check it from there.
Ensure not to leave these dishwasher models in this mode for a long time, as they can go to Error mode in very little time.
To Exit the Diagnostic mode, you can press and hold the Start button and Cycle select button simultaneously for 2-3 seconds.
Entering Factory service mode (Diagnostic mode) on GE dishwasher model GE GLDT690T
The service mode in these dishwasher models needs some extra procedures. Well, you don’t have to worry about that, as I have mentioned below the exact steps you will need to enter Diagnostic mode (service mode) in your GE GLDT690T model.
- First, turn off your appliance.
- Then, remove your dishwasher’s plug from the electrical board.
- Now, open the dishwasher’s door and plug your dishwasher back into the electric board.
- Leave the door open and turn on your dishwasher.
- Now, press the Delay and On/Off buttons together within 1 to 3 minutes of restoring the dishwasher’s power.
- After that, all the LEDs and SDD (7-segment display) will start flashing. It is an indication that you have entered Diagnostic mode.
- Now, press the Select function on the screen and choose the part you want to test.
- In these dishwasher models, you will have to select a Step, and the dishwasher will diagnose a respective component according to the step you’ve chosen.
- To get an idea of the Steps and their respective components, I am sharing a table with you.
| Step Number | Part of Dishwasher Diagnosed | SDD Code |
| 1 | Water Inlet Valve | 09 |
| 2 | Wash Pump | 08 |
| 3 | Detergent Dispenser | 07 |
| 4 | Wash Pump and Heater | 06 |
| 5 | Drain Pump | 05 |
| 6 | Load Off | 04 |
| 7 | Fill Valve | 03 |
| 8 | Wash Pump | 02 |
| 9 | Drain Pump | 01 |
| 10 | All Tests completed | F0 |
- The machine will automatically begin testing when the dishwasher door is closed.
Now, to exit this mode, you can press the On and Off button or unplug your dishwasher for a few minutes.
How to enter Test mode on a Ge Triton or PWD8900 Series dishwasher?
Entering the Diagnostic mode (Test mode) on these dishwashers is even simpler than the previous models. Here is a series of steps you will have to perform to enter Test mode.
- First, make sure your dishwasher is not running a cycle.
- Now, press and hold the ‘Cookware’ and ‘Heated Dry’ functions together for approximately 3 seconds.
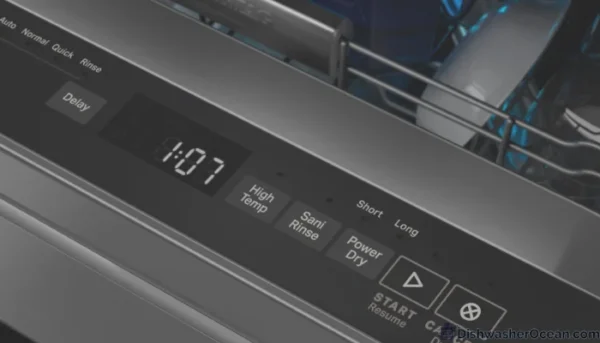
- Your dishwasher will make a Chime sound as it enters the Test cycle mode.
- Now, you can test different components of your dishwasher.
If you wish to Exit the Service mode, press the Start or Reset buttons to leave.
How to enter Service mode on GE profile PWD9700 and PWD9900 Series.
To enter Service mode on these dishwasher models, you can follow the below-mentioned steps.
- Press and hold the Down Arrow and Heated Dry buttons at the same time for about 3 seconds.
- Your dishwasher will make a chime sound to notify you that it has entered the Service/Diagnostic mode.
- After this, you can do the required tests on your dishwasher.
The procedure to Exit Diagnostic mode is the same as the other models. Press the Reset/Start button to cancel the Service mode on your dishwasher.
Note:- Don’t leave these dishwashers in Diagnostic mode for too long. It can bounce back to normal mode after an inactivity of 5 minutes.
Entering Diagnostic mode on GE Cafe dishwashers.
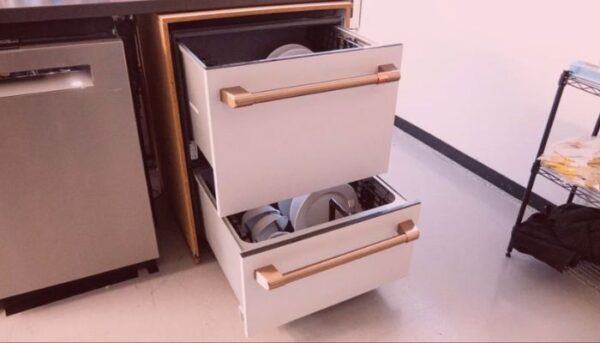
If you wish to start Diagnostic tests on your GE Cafe dishwasher, it’s a little bit tricky work. Even the GE officials don’t provide the exact necessary steps to enter.
We all know that entering this mode requires pressing specific button combinations. Here are steps to start Diagnostics on your GE cafe dishwashers.
- Put your dishwasher in a Stand-by mode.
- After that, press and hold the ‘Start’ button.
- While holding the Start button, press and hold the ‘Heated Dry’ button for 3 to 5 seconds to begin the Diagnostics.
- If this process works, you will hear a beep, and the LEDs will start flashing.
- After that, you can test your cafe dishwasher’s components.
Just Reset your cafe dishwasher to leave the diagnostics test cycles.
Identifying and resolving Error codes on GE dishwashers.
Error codes are the unique codes that describe specific issues on a dishwasher. If your Ge dishwasher detects any problem during the testing, it will display a fault code on the screen.
As I previously said, you have to identify the GE dishwasher error codes to know the issue it is describing.
Most GE dishwasher models show their fault code by flashing LEDs. Pay attention to the blinking lights as it will help you decode the error.
Now, you must think, how can I identify and fix those errors? You don’t need to go anywhere to identify and solve those errors, as I am sharing here a list of error codes with their solutions.
| LED Label | Error type | Meaning | Best Solution |
| Start light | Communication fault | The user interface cannot communicate with the appliance control board. | Reset the dishwasher and restart the diagnostic mode. |
| Heated Dry | Temperature error | Your dishwasher is not reaching the minimum wash temperature of 120℉ (49℃) from the previous 3-5 cycles. | Run the faucet and wait for the water to get warmer before starting the dishwasher. |
| Wash Boost | An issue with the thermistor | The appliance has found a short/open circuit in the thermistor. | Turn off the dishwasher’s power from the circuit breaker and reconnect power after 30 seconds. |
| Boost | Faulty turbidity sensor | There is a short/open circuit in the turbidity sensor. | Disconnect the power from the dishwasher’s circuit breaker and restore it after 30 seconds. |
However, there are furthermore codes that can appear on the control panel. Here is another list of it.
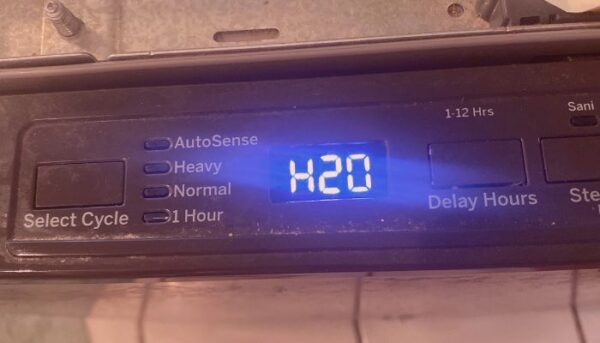
| Code | Meaning | Solution |
| H20 | Low water in the Dishwasher. | Unblock the Inlet valve. |
| C1 | The dishwasher is taking too long to drain. | Clean the Air gap and check the drain hose |
| C2 | The draining cycle is taking more than usual time. | Perform a quick reset to stop its beeping. |
| C3 | The dishwasher is not draining. | Try resetting the dishwasher. If it doesn’t work, you’ll need to learn how to drain the GE dishwasher. You can also call a professional for help. |
| C4 | Too much water in the dishwasher. | Fix the float switch or unclog the drain. |
| C5 | The dishwasher’s pump-out time is too short. | Unstick the float after ensuring the water supply. |
| C6 | The water temperature is too low. | Adjust the heater and increase its temperature. |
| C7 | The water temperature sensor circuit is damaged. | Try resetting the dishwasher and call a professional if the issue persists. |
| C8 | The detergent cup is blocked. | Remove the dishware that is blocking the cup. |
| PF | Power failure | Select the desired cycle and press the Start button. |
| H+ | Delay start mode is active. | It’s not an issue. Just turn off this mode, and your dishwasher will start functioning again. |
What should I do if the Diagnostic mode is not working on my dishwasher?
If the Diagnostic mode on your GE dishwasher is not working, you must check on these points.
Recheck the button sequence: Make sure you have pressed the right button combination. If you don’t remember the series, try again by pressing the same combination of buttons in the same sequence.
Reset your dishwasher: A quick reset is enough to fix any software glitches. Unplug your dishwasher and reconnect it after a few minutes.
Contact GE customer support: You can get their number from GE’s website. They are equipped with the correct information for every dishwasher model. They will surely help you.

Infographic: How to start diagnostic mode on GE dishwasher?
FAQs
How do I run a diagnostic test on my GE dishwasher?
Press and hold the Start and Cycle select buttons together for 5 seconds. After that, wait for the lights to go off, then press the cycle select button again for 5 seconds to start the Diagnostic mode. Now, press the Start button to begin the test.
When to use GE dishwasher diagnostic mode?
Whenever you are in doubt about malfunctioning any components of your dishwasher, you can run the Diagnostic mode to test out the functioning of that component.
How long does dishwasher diagnostic take?
The time taken to run diagnostic mode depends upon the model and manufacturer of your dishwasher. You can refer to your service manual to know the exact time requirement. In an average dishwasher, diagnostic mode can take up to half an hour to complete the testing.
Conclusion
The Ge dishwashers offer manual testing of their components through the Diagnostic feature. It is a helpful feature, especially when you are confused about which part of your dishwasher is causing a problem.
You can start the diagnostic feature by pressing some buttons in a unique sequence. These buttons vary in different dishwasher models. In this mode, your dishwasher will test its various components and will show you a fault code. Then, you can identify and fix this fault code to enjoy a fully functional dishwasher.
This was all from my side. I hope you found it helpful. If you have any queries, then comment below. I would be happy to help you further.
